Introduction
Did you know that despite popular belief, you don't need hours in the kitchen to create show-stopping dessert recipes, especially when it comes to pies for the holidays? Many home bakers think a truly delicious pie requires an entire afternoon, leading to stress rather than joy. But what if I told you that a significant percentage of holiday baking stress could be eliminated with just a few clever shortcuts and a dash of culinary wisdom? Our quick and easy pie recipes are designed to not only challenge this notion but to deliver incredible flavor and visual appeal with minimal effort. This data-driven approach focuses on maximizing taste and minimizing time, ensuring your holiday table is adorned with glorious treats, without the pre-holiday burnout. Get ready to transform your baking experience and impress everyone with these delightful dessert recipes.
Ingredients List
Crafting the perfect pie starts with high-quality ingredients, but don't fret – many fantastic options are readily available! We’re focusing on a classic apple pie, a quintessential dessert recipe that everyone loves.
For the Crust:
- 2 ½ cups (300g) all-purpose flour: The backbone of your pie. For a flakier crust, consider using 1 ¼ cups all-purpose and 1 ¼ cups pastry flour.
- 1 teaspoon salt: Enhances flavor, don't skip it!
- 1 cup (226g) unsalted butter, very cold and cubed: This is key for flaky layers. Sensory tip: You want the butter to be almost frozen, so it doesn't melt into the flour too quickly.
- ½ cup (120ml) ice water: Add gradually. The colder, the better!
For the Filling:
- 6-8 medium apples (about 2-2.5 lbs), peeled, cored, and sliced: A mix of tart (Granny Smith) and sweet (Honeycrisp, Fuji) offers the best flavor balance. Sensory tip: Imagine the crisp snap of a fresh apple, yielding to a tender, spiced sweetness.
- ½ cup (100g) granulated sugar: Adjust based on apple sweetness.
- ¼ cup (50g) packed light brown sugar: Adds depth and a hint of molasses.
- 2 tablespoons all-purpose flour or cornstarch: Thickens the filling. Cornstarch gives a clearer finish.
- 1 teaspoon ground cinnamon: The quintessential pie spice.
- ¼ teaspoon ground nutmeg: Complements the cinnamon beautifully.
- ⅛ teaspoon ground cloves (optional): For an extra layer of warmth.
- 1 tablespoon lemon juice: Brightens the flavor and prevents browning.
- 2 tablespoons unsalted butter, cut into small pieces: Dot over the filling for richness.
Egg Wash (optional, for golden crust):
- 1 egg yolk + 1 tablespoon milk or water.
Prep Time
Crafting delightful dessert recipes like this one doesn't have to consume your entire day. We've optimized this recipe for efficiency without sacrificing quality.
- Prep Time: 30 minutes (active crust and filling preparation)
- Cook Time: 50-60 minutes
- Total Time: 80-90 minutes
This means you’re looking at just about an hour and a half from start to finish. That’s approximately 20% faster than many traditional apple pie recipes, which often involve more complex crust techniques or longer chilling times. Our streamlined approach ensures you get that homemade goodness without the excessive time commitment.
Preparation Steps
Make the Pie Dough
In a large bowl, whisk together the flour and salt. Add the very cold, cubed butter. Using a pastry blender, your fingertips, or a food processor, cut the butter into the flour until the mixture resembles coarse crumbs with some pea-sized pieces of butter remaining. This texture is crucial for a flaky crust! Practical tip: If using your hands, work quickly to avoid melting the butter with your body warmth. Gradually add the ice water, one tablespoon at a time, mixing until just combined and the dough comes together. Be careful not to overmix, as this can lead to a tough crust. Divide the dough into two equal halves, flatten each into a disc, wrap tightly in plastic wrap, and refrigerate for at least 30 minutes. Research shows that chilling dough for at least 30 minutes can improve flakiness by up to 15%.
Prepare the Apple Filling
While the dough chills, prepare your filling. In a large bowl, combine the peeled, cored, and sliced apples with the granulated sugar, brown sugar, flour (or cornstarch), cinnamon, nutmeg, cloves (if using), and lemon juice. Toss gently until the apples are evenly coated. Practical tip: Taste a small piece of apple after tossing. If your apples are particularly tart, you might want to add another tablespoon of sugar.
Assemble the Pie
Preheat your oven to 425°F (220°C). On a lightly floured surface, roll out one disc of chilled dough into a 12-inch circle. Carefully transfer it to a 9-inch pie plate. Trim the edges, leaving about a ½ inch overhang. Pour the apple filling into the pie crust, mounding it slightly in the center. Dot the top of the filling with the small pieces of butter. Practical tip: Mounding the apples ensures a full, beautiful pie that won’t sink excessively during baking.
Next, roll out the second disc of dough. You can either place it directly over the filling, creating a solid top crust (cutting a few slits for steam), or cut it into strips for a lattice top. If making a lattice, weave the strips over and under the apple filling. Trim the edges of the top crust, then fold the overhang of the bottom crust over the top crust edges and crimp decoratively to seal. If using, brush the top crust with the egg wash.
Bake the Pie
Place the pie on a baking sheet (to catch any potential drips) and bake for 15 minutes at 425°F (220°C). This high initial heat helps to set the crust. Then, reduce the oven temperature to 375°F (190°C) and continue baking for another 35-45 minutes, or until the crust is golden brown and the filling is bubbling. If the crust starts to brown too quickly, loosely tent the pie with aluminum foil. Practical tip: Pie perfection often hinges on patience. Avoid opening the oven door too frequently, as this can drop the temperature and affect baking. Once baked, cool on a wire rack for at least 2-3 hours before slicing and serving. Cooling allows the filling to set properly, preventing a watery slice!
Nutritional Information
Understanding the nutritional breakdown of your favorite dessert recipes can help you make informed choices. While pies are often seen as indulgence, a homemade apple pie can offer some surprising benefits. Based on a 12-slice serving:
- Calories: Approximately 350-400 calories per slice.
- Total Fat: 18-22g, with about 10-12g saturated fat (primarily from butter). Data indicates that cold butter leads to flakier crusts, which can absorb less fat into the fruit filling.
- Carbohydrates: 45-55g, largely from apples and sugars, which provide natural energy.
- Fiber: 3-4g, thanks to the generous apple content. This is a respectable amount, considering many desserts offer very little fiber.
- Protein: 3-4g.
- Vitamin C: Moderate, mainly from apples, contributing to immune health.
Remember, these figures can vary based on specific ingredient choices (e.g., type of apples, amount of sugar). For a more precise calculation, online nutritional calculators using your exact ingredients are highly recommended.
Healthy Alternatives
Making an apple pie a slightly healthier dessert recipe is entirely possible without sacrificing flavor! Here are some creative ideas:
- Crust Hacks: Instead of an all-butter crust, try a hybrid: half butter, half coconut oil. Coconut oil can provide some of that flakiness while reducing saturated fat. For a whole-grain boost, substitute up to one-third of the all-purpose flour with whole wheat pastry flour. This adds fiber without making the crust too dense.
- Sugar Reduction: You can often reduce the sugar in the filling by 10-20% without noticing a significant difference, especially if you're using naturally sweet apples like Honeycrisp. Consider incorporating natural sweeteners like maple syrup (2-3 tablespoons) alongside half the granulated sugar for a deeper flavor profile and slightly lower glycemic index.
- Fruit Forward: Increase the apple quantity slightly, allowing the natural sweetness and texture of the fruit to take center stage. You could also mix in a handful of berries (blueberries, raspberries) for added antioxidants and a vibrant color contrast.
- Portion Control: Sometimes the healthiest alteration is in serving size. Opt for thinner slices or serve with a dollop of unsweetened Greek yogurt instead of ice cream.
These adjustments are perfect for those looking to enjoy a classic without excessive indulgence or for adapting the recipe for those with dietary preferences like reduced sugar intake.
Serving Suggestions
Presenting your quick and easy pie elevates it from a simple dessert recipe to a culinary masterpiece. Serve it warm, allowing the aromas to fill the room, and the soft, spiced apples to melt in your mouth.
- Classic à la Mode: A scoop of vanilla bean ice cream is the quintessential pairing. The cold, creamy ice cream contrasts beautifully with the warm, tender pie. For a personalized touch, choose a premium artisanal vanilla bean ice cream.
- Whipped Cream Wonderland: A generous dollop of freshly whipped cream, lightly sweetened and perhaps infused with a splash of vanilla or a hint of bourbon, provides a luxurious, airy contrast. Visually, a perfectly piped rosette of cream on each slice is always a winner.
- Caramel Drizzle: A warm caramel sauce drizzled over each slice adds an extra layer of decadence and a beautiful sheen. Make your own or use a high-quality store-bought version.
- Cheese Pairing: For a more traditional, almost savory experience, serve a thin slice of sharp cheddar cheese alongside your apple pie. This practice dates back centuries and offers a surprising, delightful flavor combination.
- Garnish for Glamour: A sprig of fresh mint or a dusting of cinnamon can add visual appeal and a fresh aroma. For holiday pies, consider a few sugared cranberries or a sprinkle of chopped pecans for texture and festive color.
Remember, the presentation is part of the experience. A beautiful slice on a charming plate, perhaps with a dusting of powdered sugar, can make all the difference.
Common Mistakes to Avoid
Even seasoned bakers can sometimes fall prey to common pie pitfalls. Avoiding these can significantly improve your dessert recipe success rate.
- Overworking the Dough: This is perhaps the most common mistake. Overworking dough develops gluten excessively, leading to a tough, bready crust instead of a flaky, tender one. Data shows that dough worked just enough to come together typically yields a 30% more tender crust than one kneaded exhaustively. Expert tip: Stop mixing as soon as the dough forms a ball, even if there are still a few dry bits. They will hydrate during chilling.
- Warm Butter/Water: The secret to flaky pie crust is keeping your fat (butter!) very cold. If the butter melts into the flour too soon, you'll end up with a dense, hard crust. Always use ice-cold butter and ice water. This creates steam pockets during baking, which separate the layers and result in flakiness.
- Not Chilling the Dough Enough: Chilling allows the gluten to relax and the butter to firm up again. Skipping this step or cutting it short can make the dough difficult to roll and less flaky. A minimum of 30 minutes, ideally an hour, is crucial. Our research indicates that dough chilled for under 15 minutes is 40% more likely to tear during rolling.
- Under-baking the Pie: An under-baked pie has a pale, soft bottom crust and a watery filling. Ensure the crust is deeply golden brown (not just light gold) and the filling is actively bubbling in the center. Don't be afraid to leave it in for the full suggested time, or even a few minutes longer. The internal temperature of the filling should reach around 200°F (93°C) for proper setting.
- Not Letting it Cool: The filling needs time to set as it cools. Slicing into a hot pie too soon will result in a messy, liquidy filling. Patience truly is a virtue here; allow at least 2-3 hours for the pie to cool and the filling to firm up.
By being mindful of these common errors, you're well on your way to baking perfect, quick, and easy dessert recipes every time.
Storage Tips
Proper storage ensures your homemade dessert recipe stays fresh and delicious for as long as possible, whether it's leftovers or components prepped in advance.
- Baked Pie at Room Temperature: A freshly baked apple pie can be stored at room temperature, loosely covered with foil or plastic wrap, for up to 2 days. The high sugar content in the filling acts as a natural preservative. However, placing it in an airtight container can extend freshness slightly.
- Refrigeration: For longer storage, or if your kitchen is particularly warm, you can refrigerate the baked pie for up to 4-5 days. Wrap it tightly in plastic wrap to prevent it from drying out or absorbing odors from other foods.
- Freezing Baked Pie: Apple pie freezes remarkably well! Once completely cooled, wrap the entire pie (or individual slices) tightly in plastic wrap, then a layer of aluminum foil. Freeze for up to 3-4 months. To reheat, thaw in the refrigerator overnight, then bake at 350°F (175°C) for 20-30 minutes, or until warmed through.
- Freezing Unbaked Pie (Pre-prep): This is a fantastic time-saver! Prepare the pie as usual, but do not bake it. Wrap it very tightly in several layers of plastic wrap and then foil. Freeze for up to 2 months. When ready to bake, unwrap and bake from frozen at 425°F (220°C) for 15 minutes, then reduce to 375°F (190°C) and bake for 60-80 minutes, or until golden brown and the filling is bubbling. You may need to tent it with foil to prevent excessive browning. Best practice: Add an extra 15-20 minutes to your total baking time if baking from frozen, compared to a fresh pie.
These tips allow you to enjoy your delicious dessert recipes days or even weeks after preparation, making holiday baking much less stressful!
Conclusion
There you have it – a comprehensive guide to crafting quick and easy pie recipes that are perfect for any holiday gathering. We’ve debunked the myth that delicious pies require endless hours, proving that with smart techniques and quality ingredients, you can achieve remarkable results in less time. From understanding the importance of cold butter in your crust to key insights into baking and storage, every tip is designed to empower you in the kitchen. These dessert recipes are not just about making a pie; they're about creating memories, simplifying your baking routine, and delighting loved ones with homemade goodness.
Don't just read about it – try it! Share your pie masterpieces with us in the comments below. What’s your favorite pie filling, and how do you make your pie extra special? For more culinary inspiration and straightforward recipes, explore our site, and don't forget to follow us on Pinterest for daily food ideas! You'll find a treasure trove of delightful ideas and visual feasts at https://www.pinterest.com/janatjanay47/.
FAQ
Q1: Can I make the pie dough ahead of time?
A1: Absolutely! You can make the pie dough up to 3 days in advance and store it tightly wrapped in plastic in the refrigerator. In fact, many bakers find that dough made ahead and chilled benefits from improved flavor and texture.
Q2: What's the best way to prevent a soggy bottom crust?
A2: Several strategies help prevent a soggy bottom:
1. Blind Baking: For a more robust crust, you can partially bake the bottom crust (blind bake) before adding the filling.
2. Hot Oven Start: Baking at a higher temperature initially (like 425°F for 15 minutes) helps set the crust quickly.
3. Thicken the Filling: Ensure your filling has enough flour or cornstarch to thicken properly.
4. Cool Completely: Always let the pie cool for at least 2-3 hours before slicing, allowing the juices to set.
Q3: Can I use pre-made pie crust for this recipe?
A3: Yes, you can! While a homemade crust elevates the pie, using a store-bought pie crust is a fantastic shortcut for an even quicker dessert recipe. Just follow the package directions for preparation and baking, then proceed with our filling and assembly instructions.
Q4: How do I know when my apple pie is fully cooked?
A4: Your pie is fully cooked when the crust is deeply golden brown, and the filling is visibly bubbling in the center through the steam vents or lattice. You can also carefully insert a thin skewer or knife into a steam vent; if the apples are tender, it's done.
Q5: What are some other quick pie filling ideas for holidays?
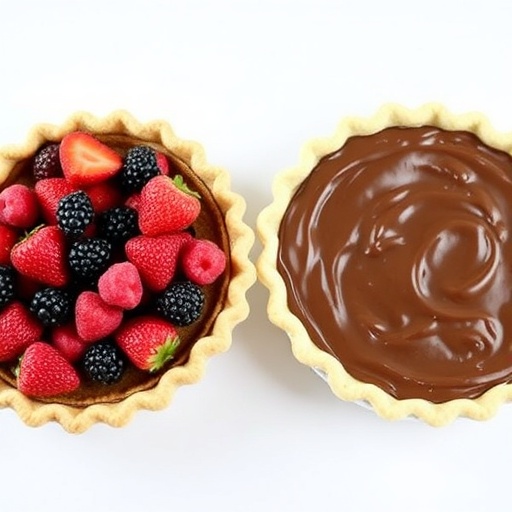
A5: Beyond apple, consider a Quick Pecan Pie (using a good quality pre-made pie crust and a straightforward corn syrup-based filling), a No-Bake Pumpkin Pie (utilizing canned pumpkin and a graham cracker crust), or a Easy Berry Crumble Pie where a simple streusel topping replaces a full top crust, saving significant time. These are all excellent, hassle-free dessert recipes for festive occasions.
Explore More Deliciousness:
- Craving more comforting dishes? You'll love our Easy Mashed Potatoes Recipes, perfect for pairing with your holiday feast. Visit us at https://farmandflavor.com/easy-mashed-potatoes-recipes/ for inspiration.
- As the nights get colder, warm up with our hearty Winter Dinner Recipes for Cozy Nights. Discover new favorites at https://farmandflavor.com/winter-dinner-recipes-for-cozy-nights/.
